


Your Next Move, Planned.
Master Chia Seed Sprouting: Top Techniques
Help Others Prepare
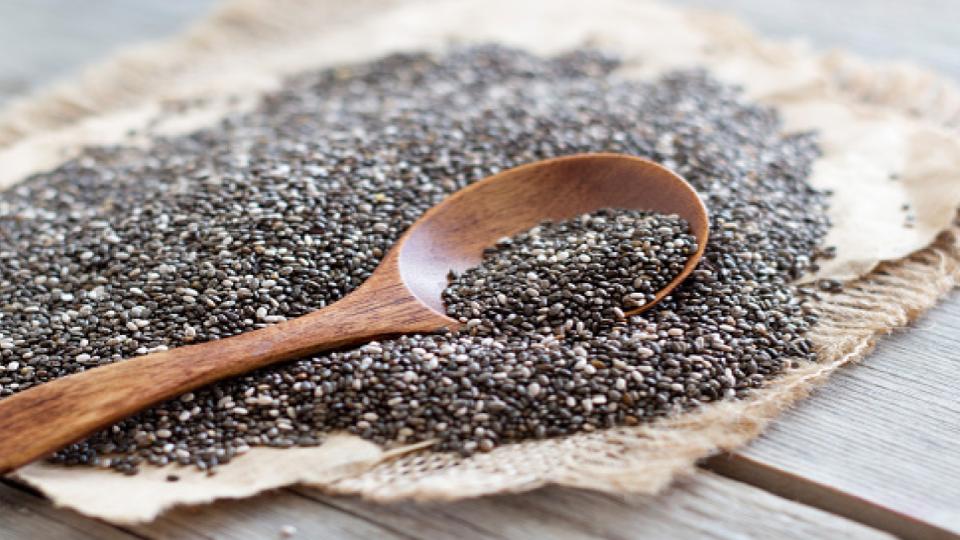
The Health Benefits of Chia
Incorporating chia seeds into your daily diet represents one of the most effective strategies for boosting your intake of essential nutrients. While many individuals immediately associate protein-packed meals rich in omega-3 fatty acids with fish, it is worth noting that chia seeds provide an exceptional alternative, particularly for those following a vegan lifestyle. In fact, these tiny powerhouses stand out as the most economical source of omega-3 fatty acids available on the market today.
The advantages of consuming chia seeds extend far beyond their impressive nutritional profile. Consider the following key health benefits they offer:
- Chia seeds possess remarkable properties that help prevent the formation of blood clots within the bloodstream.
- They contribute to elevating levels of beneficial cholesterol in the body while simultaneously working to lower overall blood pressure.
- These seeds exhibit potent anti-inflammatory effects, aiding in the reduction of chronic inflammation throughout the body.
- For expectant mothers, chia seeds play a vital role in supporting the healthy development of the baby’s brain and enhancing the mother’s overall nutritional status during pregnancy.
- Regular consumption of chia seeds can significantly diminish the risk of developing adult-onset diabetes.
Why Sprout Chia Seeds?
Although chia seeds have long served as a fundamental dietary component in various cultures around the world, they come equipped with a tough, hardened outer layer that poses challenges for proper digestion in the human body. This rigid shell not only complicates the digestive process but also hinders the effective absorption of crucial nutrients and vitamins contained within the seed.
Fortunately, the process of sprouting chia seeds offers an ideal remedy to this issue. By initiating the sprouting process, you effectively soften and break down that impenetrable outer coating. This transformation allows your body to more readily access and assimilate the full spectrum of vitamins, minerals, and other vital compounds locked inside.
Sprouting unlocks greater bioavailability of key elements such as dietary fiber, high-quality proteins, and essential omega-3 fatty acids. As a result, chia sprouts prove much simpler for the digestive system to process compared to their unsprouted counterparts. Moreover, these tender sprouts often deliver an even higher concentration of nutrients than the mature seeds themselves, making them a superior choice for health-conscious individuals seeking maximum nutritional value.
How to Sprout Chia Seeds
1. The Terra-Cotta Tray Method
Terra-cotta trays, crafted from brownish or earthy orange-toned clay that has been shaped and fired for durability, provide an outstanding medium for sprouting chia seeds. These trays, plates, or pots frequently feature artistic designs resembling animals or human figures, but their true value lies in the porous nature of the material. This porosity enables the surface to draw moisture upward through capillary action, ensuring the seeds stay consistently hydrated without becoming waterlogged during the germination phase.
Unlike raw clay, which remains malleable until processed, terra-cotta arrives pre-formed and kiln-hardened, often derived from diverse organic clay sources. The material’s breathable quality promotes superior airflow around the seeds, safeguarding against excessive dampness that could compromise sprout quality and lead to mold or rot.
To successfully sprout chia seeds using this terra-cotta tray approach, adhere to these detailed steps:
- Evenly distribute an appropriate quantity of chia seeds across the terra-cotta tray or dish’s surface, avoiding overcrowding to allow for proper growth.
- Prepare water in a separate, larger container rather than pouring it directly onto the seed-laden tray.
- Position the terra-cotta dish atop the water-filled container, ensuring the liquid level remains below the tray so it does not submerge or flood the seeds.
- Securely cover both the tray and the water container to minimize evaporation and maintain stable humidity levels.
- Allow the terra-cotta to naturally wick up precisely the right amount of moisture, keeping the seeds damp and primed for sprouting over the coming days.
2. The Covered Moisture Method
Among the easiest techniques for germinating chia seeds is the covered moisture method, which relies on basic household items such as shallow trays, aluminum foil plates, a lid or cover, and plain water. This straightforward process minimizes equipment needs while delivering reliable results.
Follow these instructions to execute the covered moisture method effectively:
- Begin by thoroughly cleaning your chosen shallow containers, whether they are plastic trays or disposable aluminum plates, to eliminate any contaminants.
- Introduce a balanced ratio of water and seeds into the container-for instance, use two tablespoons of water paired with two tablespoons of seeds for optimal hydration without excess.
- Allow the mixture to rest in the tray for approximately one hour, then carefully tilt the container to pour off the excess water, leaving the seeds adequately soaked.
- Once the seeds have absorbed moisture and swelled slightly, cover the tray securely to create a humid microenvironment conducive to sprouting.
- Typically, visible sprouting will commence after around four days of consistent moisture and darkness.
- When the sprouts reach a length of about a quarter-inch, introduce them to indirect sunlight, which will encourage the leaves to develop their characteristic green hue through photosynthesis.
3. The Chia Pet Technique
Chia seeds germinate effortlessly on any moisture-retaining, porous substrate that supports root development and water uptake, such as clay figures, paper, fabric, or even sponges. This versatile Chia Pet-inspired technique adapts easily to various planters.
- Fill a tray, plate, or small dish with roughly a quarter cup of water to create a soaking reservoir.
- Submerge your chosen porous planter-such as a terra-cotta animal or similar shape-in the water for about 60 minutes to fully saturate it.
- Separately moisten the chia seeds for 60 minutes, then evenly distribute them over the dampened planter surface.
- Gently spread the seeds into the planter’s textured grooves using a small knife or spatula for uniform coverage.
- Periodically add water to the planter to counteract drying, with sprouts typically emerging after about five days.
- In particularly arid indoor environments, enclose the planter in a plastic bag to trap humidity and accelerate germination.
- Once initial sprouting occurs, remove any covering and shield the delicate chia sprouts from harsh direct sunlight to prevent scorching.
4. The Wide-Mouth Jar Technique
For those seeking the most uncomplicated and reliable sprouting solution, the wide-mouth jar method reigns supreme. Pair it with a breathable cheesecloth secured by a rubber band to maintain moisture while permitting airflow.
- Measure approximately four tablespoons of chia seeds into the jar.
- Pour in three times the volume of water compared to the seeds and let them soak for a full 12 hours.
- Drain the jar completely after soaking.
- Refill with fresh water, gently rinse the seeds to remove any debris, then drain once more.
- Position the jar in a shaded spot away from direct sunlight.
- Rinse the seeds twice daily-morning and evening-for up to a week or until sprouts fully develop.
- For longer sprouts, perform a final rinse to shed the loosened seed coats and hulls.
Sprout length is a matter of personal preference, so harvest at your desired size. Enjoy them raw in salads or lightly cooked in recipes. Always drain thoroughly before storage, which should not exceed 10 days in the refrigerator.
5. The Spray and Tray Method
This variation eschews wicking materials in favor of manual misting to sustain hydration. Scatter a thin layer of chia seeds across a tray or dish, then mist them twice daily-once in the morning and once in the evening-with a fine spray bottle.
Provide indirect sunlight exposure during daylight hours to support growth. With proper care, expect sprouts within 7 to 10 days. To reduce spraying frequency and enhance germination, dome the tray with a clear glass or plastic cover, which traps moisture and fosters a stable, humid environment.
6. Paper Towel Method
The paper towel approach offers another dependable, no-fuss option using minimal supplies: a shallow dish, water, and a couple of paper towels.
- Fold two paper towels and lay them flat at the bottom of the dish.
- Add water until the towels are thoroughly saturated but not pooling.
- Distribute chia seeds evenly over the damp towels, maintaining moisture by adding water as needed.
- Once sprouting begins, shift to indirect sunlight for greening.
7. The Jiffy Pot Method
Jiffy pots, made from compressed wood or peat fibers, excel as self-wicking vessels for sprouting. Opt for a 3-inch pot or larger for ample space.
- Soak the jiffy pot in water until fully hydrated.
- Fill a supporting tray, plate, or dish with water.
- Roll the soaked pot over chia seeds until its surface is generously coated.
- Invert the pot and place it atop the water-filled dish.
- Monitor and replenish water daily to maintain a 1 cm depth, accounting for evaporation.
- Sprouts should appear within a few days under these conditions.
Takeaway
Chia seeds qualify as powerhouse superfoods brimming with vital nutrients, yet their dense outer coating often impedes full digestion and nutrient uptake. Mastering the art of sprouting chia seeds effectively dismantles this barrier, unlocking the seeds’ complete nutritional potential. Sprouts, in general, surpass even mature plants in terms of nutrient density and bioavailability, rendering them an invaluable addition to any wellness-focused regimen.